Setting
- Log in to post comments
- Tiếng Việt
- 繁體中文
Basic information
1. Purpose
- Support users to set up basic information related to items that need to be managed such as accounts, vehicles and drivers.
2. Implementation conditions
- Users are authorized to Basic information in the authorization function of the system.
3. Implementation instructions
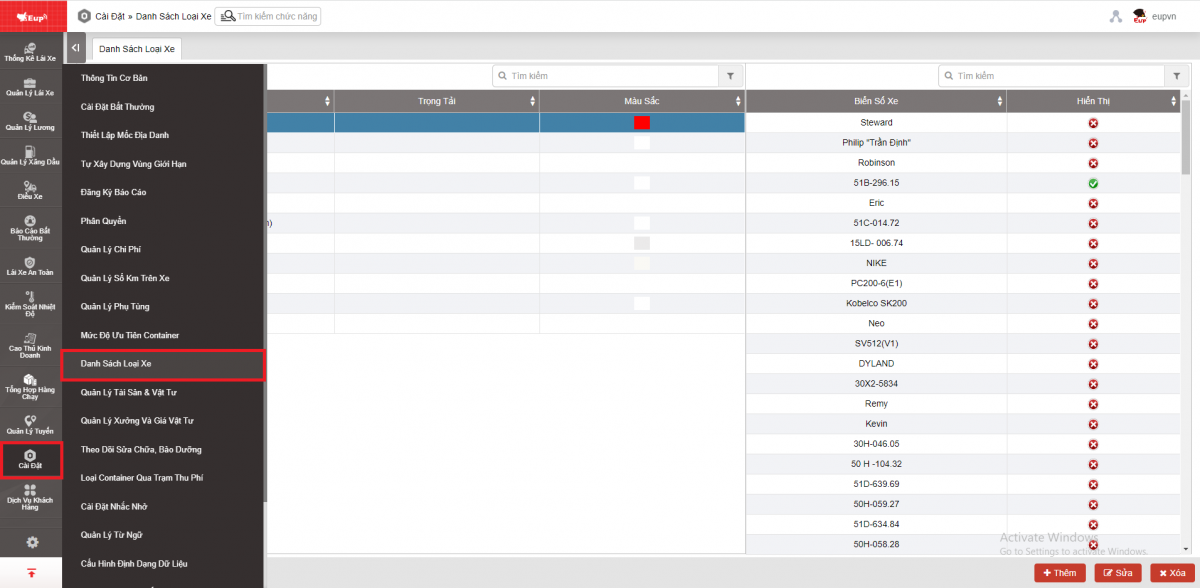
- Go to the Regulation Report/Basic information

- The function display screen consists of 7 tabs:
+ Basic Information Tab: Set up basic account information
+ Car Information Tab: Set up vehicle information
+ Name List Tab: Manage information related to the driver list
+ Temperature & IO Tab: Related to vehicle air conditioning
+ Propotion Tab: Set up safe driving parameters
+ Government Information Tab: Information transmitted to the General Department of Roads
+ Trailer Information Tab: Manage and set up information about trailers
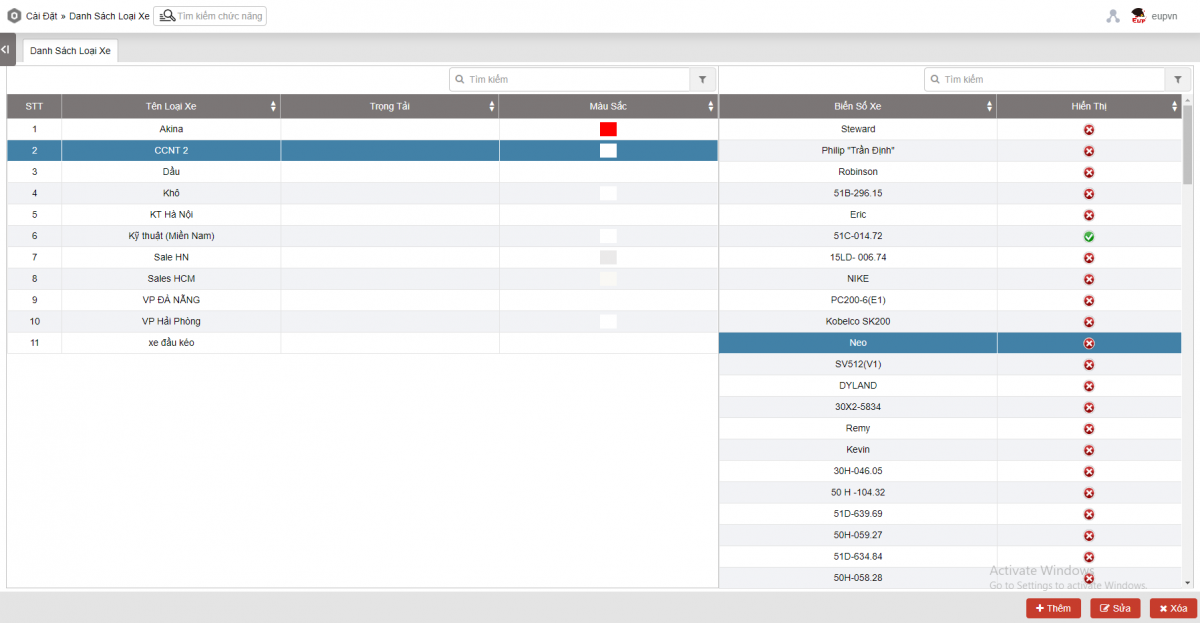
- Basic Information Tab

-
Account information : Configure user account related information
-
Logo: Support users to update their account avatars following these steps
-
Step 1: Click on the Avatar line
Step 2: Drag or select the avatar according to the instructions in the Edit Avatar form

- Step 3: Edit the image size accordingly and n Save if you want to update the avatar or Cancel if you want to stop editing the avatar
- User name: Default is the login account. Support users to change account name according to the following steps
Step 1: Click on the Account Name line
Step 2: Update Account Name information

- Step 3: Click Save if you want to update the new account name or Cancel if you want to stop the operation
- Password: Allows users to edit the password. To change the password, follow these steps:
Step 1: Click on the Password line
Step 2: Enter the current password, new password and confirm the new password

- Step 3: Click Save if you want to update the new password or Cancel if you want to stop the operation
Note: If the user is assigned Option VN98J Hide Change Password feature
- Landmark Passed Time Default: The default is 5 minutes and allows users to edit according to the following steps
- Step 1: Click on the Default Over Time line
Step 2: Update the default over time minutes

- Step 3: Click Save if you want to update or Cancel if you want to stop the operation.
-
Show new warning: Allows users to Enable/Disable the display feature and set up new warnings at Settings/Abnormal Settings
Automatic Login: Allows users to Enable/Disable the automatic login feature when users access the system page. Default Disable function
Map information: Allows users to configure information related to the account's map such as
Preset location: Users choose the location when accessing the map system to zoom in - Car Information Tab

- Car No.
- Car name
- Plate number
- Name : Driver name. In case the vehicle is assigned a Camera, if the driver name information is left blank, the system will update the warning to the Map page
- Phone1, Phone 2: Vehicle contact phone number
- Fuel use (Lít/100Km): Liters of fuel consumed when the vehicle travels 100 km
- Fuel use (Lít/giờ): Liters of fuel consumed in 1 hour
- Loading oil consumption (Lít/Km): Kilometers when the vehicle is carrying goods corresponding to 1 liter of fuel
- Fuel type: Type of fuel used by the vehicle
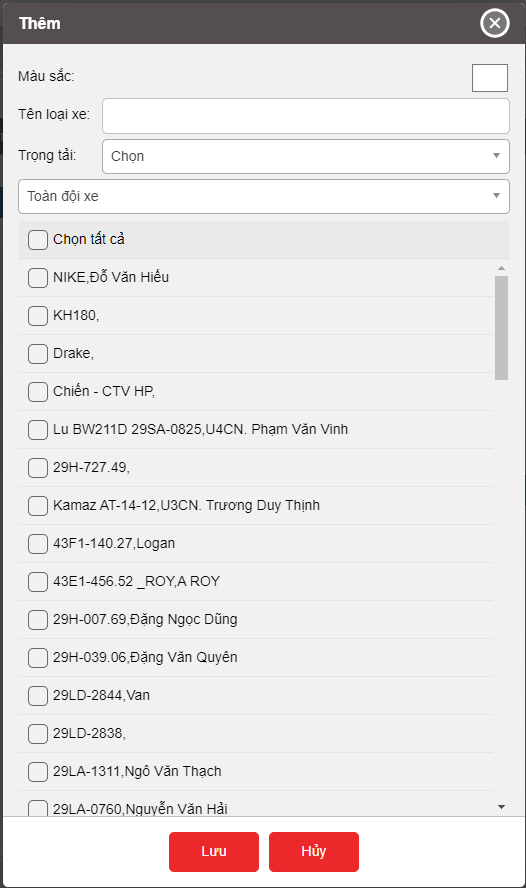
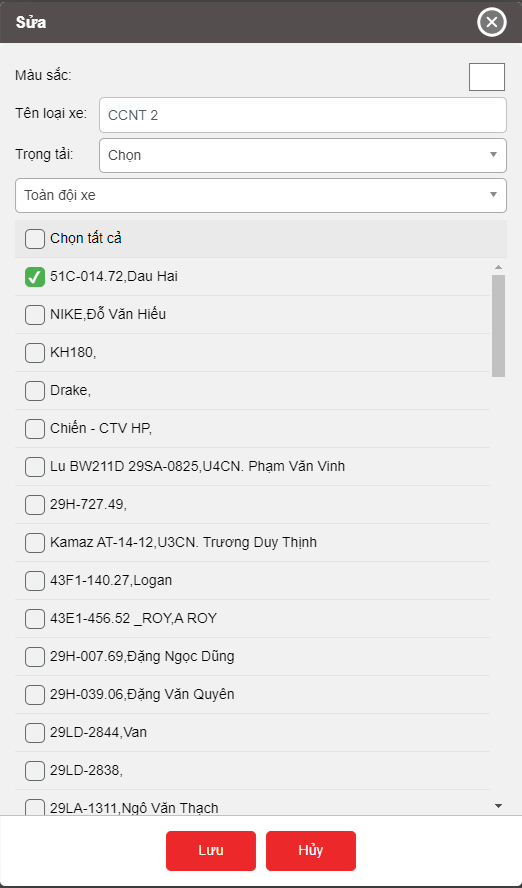
- Car symboy: Vehicle icon corresponding to the Type of vehicle used by the enterprise
- Main factory area: Main factory area of the vehicle
- Vehicle type (Toll station/Max speed config): Set the vehicle type to support charging when passing through the toll station and Determine the maximum speed as well as warn vehicles that have not set the Vehicle Type according to Circular 31/2019/TT-BGTVT. In case the motorbike, construction vehicle or trailer does not have the maximum speed determined according to the Circular, another Vehicle Type will be set and will not be warned.
- Group
- Payload: Maximum volume of goods that the vehicle can hold
- Load weight (tons): Maximum load of goods that the vehicle can carry
- User selects the line to change the information and presses the button
 to change the vehicle information
 - Select the icon
 to print the report;
 - Select the icon
 to download the report in excel format
 - Name List tab

- Driver
- Phone1, Phone 2: Vehicle contact phone number
- Driver's License Number: Enter the driver's license number corresponding to each driver. In case the driver is assigned to a vehicle with a camera, if he/she does not have a driver's license, he/she will be warned to the Map page
- Expiry Date (YYYY-MM-DD): In case the driver is assigned to a vehicle with a camera, if the driver's license has expired, he/she will be warned to the Map page
- RFID
- Driver Identity: Driver's identification documents such as ID card, citizen identification
- Identity Issued On: Information on the date of issue of the Citizen Identification Number
- Identity Issued Place : Information on the place of issue of the Citizen Identification Number
- Expiry Date of Driver: Driver account expiration date information. After the driver expiration date, driver related reports and searches by driver name will not show expired driver names.
- Select the line to edit, press the icon
 , the vehicle maintenance editing screen is as follows:

- Select Save to update new driver information
- Select Add to add new driver

- Select the driver line to delete, click Delete

- Select Delete to delete the driver information or No if you want to cancel the driver deletion operation
- Temperature & IO Tab

- Plate number
- Temperature 1 Name
- Temperature 1
- Temperature 2 Name
- Temperature 2
- Lower Limit
- Upper Limit
- IO1 Name
- IO2 Name
- Select the line to edit, press the icon , the vehicle maintenance editing screen is as follows:

- Select Save to update vehicle temperature information.
- Propotion Tab

- Overspeeding
- Harsh braking
- Harsh acceleration
- Front collision
- Lane drift
- Sharp turn
- Driving continuously for more than 4 hours
- Total driving time today exceeds 10 hours
- Fatigue driving
- Select Save to update new information
- Government Information Tab

- Plate Number
- Business type
- Car symbol:
- Company: Name of the vehicle management company
- Tax code: Tax code of the vehicle management company
- Transport manager
- Chassis: vehicle chassis
- Machine Number
- Manufacturing Date: Vehicle manufacture date
- Select the line to edit, press the icon , the screen to edit the information transmitted to TCDB is as follows

- Select Save to update new TCDB information
- Trailer Information Tab

- Plate Number
- Car No.
- Car Name
- TrailerID
- Log in to post comments
- Tiếng Việt
- 繁體中文
Alert Settings
1. Purpose
- Allows users to set up warning displays when violating such as: Overspeeding, Stopping the vehicle without turning off the engine, Loss of temperature signal, electronic zoning, etc. This setting will be the basis for calculating violation reports.
2. Implementation conditions
- Users are authorized to the Alert Settings function
3. Implementation instructions
- Go to the Alert Settings/Setting

- The new warning setting function screen displays 3 parts:
+The Alert Settings section allows setting reminder and warning limits when violating
+ The Geofencing section allows setting the time when vehicles are allowed to enter and exit the Geofencing
+ Zalo Setting Section
Alert Settings includes 2 sections
- Mục 1: General Configuration - Allows users to set up general information about applications receiving warnings, receiving warnings from vehicles,... for all warning groups

- Warning on applications: Allows users to choose how to receive warnings when there is an abnormality including: Web - Displays a popup warning on the alarm bell, App - Displays notifications on mobile devices, Email - Sends warnings to the email set at "Email to receive warnings", SMS - Sends messages to the phone number set at "Phone number to receive warnings" (Note that this feature requires a service fee).
Applies to all devices: When enabling Web and App settings, the On/Off status will be applied to devices logged in with the same account
Receive warnings from vehicles: Configure to receive warnings from the list of selected vehicles
Click Save to save the information just installed
+ Section 2: Set up warning groups - Allows users to set up detailed warnings for each warning group

- The user selects the warning group to be set by clicking on the corresponding warning group. The system displays the setting function screen for each warning group, consisting of two parts:
- General settings for the warning group
- Settings for each warning

- General settings for alert groups: (Only applicable to each warning group)
- Notification: Enable receiving warnings for the group if enabled. The feature is enabled when there is at least one warning that enables receiving notifications. Notification On/Off information applies to each device
- General Configuration Settings: Settings such as warnings on applications, applying to all devices, receiving warnings from vehicles in the warning group will be set by default as General Configuration if this feature is enabled. If the General Configuration Settings feature is not enabled, the user can customize the settings for information such as Warnings on applications; Apply to all devices: Receive warnings from vehicles for the warning group similar to the General Configuration Settings..
- Warnings on applications: Allows the user to choose how to receive warnings when there is an abnormality including: Web - Displays a popup warning on the alarm bell, App - Displays notifications on mobile devices, Email - Sends warnings to the email set at "Email to receive warnings", SMS - Sends messages to the phone number set at "Phone number to receive warnings" (Note that this feature requires a service fee).
- Applies to all devices: When enabling Web and App settings, the On/Off status will be applied to devices logged in with the same account
- Receive warnings from vehicles: Configure to receive warnings from the list of selected vehicles
- Settings for each warning: Allows users to configure violation limits and enable/disable reminder notifications when violating (Details of each warning group in section 4) (Only applicable to each warning in a group)
- Select the Save button in the right corner of the screen to save the information set for the warning group
- Select the Back Or button  to return to General Configuration
4. Detailed installation instructions for each warning
4.1. status group
Allows users to set up warnings related to vehicle status such as Over speed, Disconnection, Stopping without turning off the engine...
- Over speed:

+ Enable warning: Receive abnormal warnings when the vehicle violates the allowed speed if this feature is enabled (Applies separately to each device)
+ Remind when abnormal N times: If abnormal occurs N times, display a reminder, default N= 1
+ Cycle: Allows the user to choose the reminder cycle for the warning, including
- Continuous (default): Continuously warn until the abnormality is gone
- One time: Only warn once when an abnormality occurs
- Repeat N minutes: After every N minutes, the system will remind again if the abnormality is still present
+ Range 1: Default 120km/h, allows the user to change the speed limit in the Statistics Search report/Speed beyond the set range
+ Range 2: Default 120km/h, allows the user to change
+ Range 3: Default 120km/h, allows the user to change when the vehicle exceeds the set speed limit This setting will be considered abnormal and a warning will be displayed
- Turn off long:

+Enable warning: Receive warnings when the vehicle is off for more than the specified time if this feature is enabled (Applies separately to each device)
+ Reminder when abnormality occurs N times: If abnormality occurs N times, a reminder will be displayed
+ Set the display setting of the N-minute function page: Set the time when the shutdown event is considered abnormal for warning (Default 10 hours). If abnormality occurs N minutes, it will be aggregated to the abnormality report
+ Cycle: Allows the user to choose the reminder cycle for the warning. including
- Continuous (default): Continuously warn until the abnormality is gone
- Once: Only remind once when an abnormality occurs
- Repeat N minutes: After every N minutes, the system will remind again if the abnormality is still present
- No Signal:

+ Enable warning: Receive warnings when the vehicle is in the Disconnected state for more than the specified time if this feature is enabled (Applies separately to each device)
+ Reminder when abnormality occurs N times: If abnormality occurs N times, a reminder will be displayed
+ Set the display setting of the N-minute function page: Set the time for the disconnection event to be considered abnormal for warning (Default 30 minutes). If abnormality occurs N minutes, it will be aggregated into the abnormality report
+ Cycle: Allows the user to choose the reminder cycle for the warning. including
- Continuous (default): Continuously warn until the abnormality is gone
- Once: Only remind once when an abnormality occurs
- Repeat N minutes: After every N minutes, the system will remind again if the abnormality persists
- Idling:

+ Enable warning: Receive warnings when the vehicle is in the Stop state without turning off the engine for more than the specified time if this feature is enabled (Applies separately to each device)
+ Reminder when abnormality occurs N times: If the abnormality occurs N times, a reminder will be displayed
+ Set the display setting of the N-minute function page: Set the time for the Stop event without turning off the engine to be considered abnormal for warning (Default 15 minutes)
+ Cycle: Allows the user to choose the reminder cycle for the warning. including
- Continuous (default): Continuously warn until the abnormality is gone
- Once: Only remind once when an abnormality occurs
- Repeat N minutes: After every N minutes, the system will remind again if the abnormality is still present
- Road speed limit:

+ Enable warning: Receive warnings when driving in violation of the speed limit on the route if this feature is enabled (Applies separately to each device)
+ Reminder when abnormality occurs N times: If abnormality occurs N times, then display a reminder
+ Cycle: Allows the user to choose the reminder cycle for the warning. including
- Continuous (default): Continuously warn until normal activation is over
- One time: Only remind once when abnormality occurs
- Repeat N minutes: After every N minutes, the system will remind again if the abnormality is still present
- Over speed in area: Option 20 to enable "zone blocking" and set speed limits

+ Enable warning: Receive warnings when driving in violation of the speed limit in the limited area (Applies separately to each device)
+ Reminder when abnormality occurs N times: If abnormality occurs N times, then display a reminder
+ Cycle: Allows the user to choose the reminder cycle for the warning. including
- Continuous (default): Continuously warn until normal on is over
- One time: Only remind once when abnormality occurs
- Repeat N minutes: After every N minutes, the system will remind again if the abnormality is still present
4.2. Sensor Device
Allows users to set up warnings related to sensor devices such as: Oil Fill, Oil Drain, Temperature...
- Pour notification:

+ Enable warning: Receive warnings when the vehicle is refueling if this feature is enabled (Applies separately to each device)
+ Cycle: Allows the user to select the reminder cycle for the warning. including
- Continuous (default): Continuously warn until the abnormality is gone
- One time: Only warn once when an abnormality occurs
- Repeat N minutes: After every N minutes, the system will remind again if the abnormality is still there
- Withdraw notification:

+ Enable warning: Receive warnings when the vehicle performs oil drain if this feature is enabled (Applies separately to each device)
+ Cycle: Allows the user to select the reminder cycle for the warning. including
- Continuous (default): Continuously warn until the abnormality is gone
- One time: Only warn once when an abnormality occurs
- Repeat N minutes: After every N minutes, the system will remind again if the abnormality is still there
- Abnormal temperature:

+ Enable warning: Receive warnings when the temperature is not within the lower and upper temperature thresholds defined by the user in the function "Settings/Basic information/Vehicle information/Temperature &IO tab" if this feature is enabled (Applies separately to each device)
+ Reminder when abnormality occurs N times: If abnormality occurs N times, a reminder is displayed
+ Cycle: Allows the user to choose the reminder cycle for the warning. including
- Continuous (default): Continuously warn until normal on is over
- Once: Only remind once when abnormality occurs
- Repeat N minutes: After every N minutes, the system will remind again if the abnormality is still present
- Lost Temperature:

+Enable warning: Receive warnings when the temperature signal loss time exceeds the specified number of minutes if this feature is enabled (Applies separately to each device)
+ Reminder when abnormal N times: If the abnormality occurs N times, a reminder will be displayed
+ Set the display setting of the N-minute function page: Set the time when the temperature signal loss event is considered abnormal for warning (Default 10 minutes)
+ Cycle: Allows the user to choose the reminder cycle for the warning. including
- Continuous (default): Continuously warn until the abnormality is gone
- Once: Only remind once when an abnormality occurs
- Repeat N minutes: After every N minutes, the system will remind again if the abnormality is still present
- SOS notification:

+Enable warning: Receive warnings when the driver presses the SOS button on the device assigned to the vehicle if this feature is enabled (Applies separately to each device)
+ Cycle: Allows the user to select the reminder cycle for the warning. including
- Continuous (default): Continuously warn until the abnormality is gone
- One time: Only warn once when an abnormality occurs
- Repeat N minutes: After every N minutes the system will remind again if the abnormality persists
With the SOS warning only occurring instantly, the system only warns once with 1 SOS press
- Camera disconnect:

+ Enable warning: Receive warnings when the camera loses signal for more than the specified number of minutes if this feature is enabled (Applies separately to each device)
+ Reminder when abnormal N times: If abnormal occurs N times, a reminder will be displayed
+ Set display settings for the N-minute function page: Set the time when the camera signal loss event is considered abnormal for warning (Default 6 minutes).
+ Cycle: Allows the user to select the reminder cycle for the warning. including
- Continuous (default): Continuously alert until the abnormality is gone
Once: Only alert once when an abnormality occurs
Repeat N minutes: After every N minutes, the system will alert again if the abnormality is still there
- Low fuel:

+ Enable warning: Receive warnings when the oil level is lower than the total specified oil level if this feature is enabled (Applies separately to each device)
+ Set the N % function page display setting: Set the time when the oil level event is considered abnormal for warning. The event is considered abnormal for warning when the Number of liters of oil in the tank < = a% of the total capacity of the vehicle's oil tank
For example: The vehicle's oil tank has a capacity of 340 liters. Set the function page display setting: 5% => When the vehicle has (5% * 340) = 17 liters, there will be an abnormal low oil level warning
+ Cycle: Allows the user to select the reminder cycle for the warning. including
- Continuous (default): Continuously alert until the abnormality is gone
Once: Only alert once when an abnormality occurs
Repeat N minutes: After every N minutes, the system will alert again if the abnormality is still there
- Fuel idling consumption:

+ Enable warning: Receive warnings when the vehicle is in a stopped state without turning off the engine and the fuel consumption exceeds the specified level if this feature is enabled (Applies separately to each device)
+ Set up the display of the N Liter function page: Set the time when the event of the vehicle being stopped without turning off the engine and the fuel consumption is considered abnormal to warn.
+ Cycle: Allows the user to select the reminder cycle for the warning. including
- Continuous (default): Continuously alert until the abnormality is gone
Once: Only alert once when an abnormality occurs
Repeat N minutes: After every N minutes, the system will alert again if the abnormality is still there
- Open door warning:

+ Enable warning: Receive warnings when the car door is opened for more than the specified number of minutes if this feature is enabled (Applies separately to each device)
+ Reminder when abnormal N times: If abnormal occurs N times, display a reminder
+ Set display settings for N minutes function page: Set the time when the door opening event is considered abnormal for warning (Default 5 minutes)
+ Cycle: Allows the user to select the reminder cycle for the warning. including
- Continuous (default): Continuously alert until the abnormality is gone
Once: Only alert once when an abnormality occurs
Repeat N minutes: After every N minutes, the system will alert again if the abnormality is still there
- Abnormal discharge out: Allows setting up a warning when the vehicle discharges concrete outside the Main Station and any Restricted Area (Construction Site) or any Temporary Station and any Restricted Area (Construction Site)
+ Set the time on the report page... Minutes: When the concrete is discharged outside the Main Station and Construction Site or any Temporary Station and any Restricted Area for more than 1 minute, a warning will be sent to the system
+ Abnormal concrete discharge logic:
- If no temporary station is selected, discharge outside the main station and any restricted area (construction site) is abnormal
- If a temporary station is selected, discharge outside the temporary station and any restricted area (construction site) is abnormal
- Fatigue driving: Allows setting up warnings when drivers violate distracted driving
4.3. Landmark Warning
- Warning near landmarks:

+ Enable warning: Receive warnings when the vehicle approaches the milestone if this feature is enabled (Applies separately to each device).
Distance limit: Default 2km, in case the user needs to change the distance, change the setting parameters compared to the default
When the vehicle approaches the milestone and satisfies the set distance, the system records the vehicle approaching the distance
+ Reminder when abnormality occurs N times: If abnormality occurs N times, a reminder is displayed
+ Cycle: Allows the user to select the reminder cycle for the warning. including
- Continuous (default): Continuously alert until the abnormality is gone
Once: Only alert once when an abnormality occurs
Repeat N minutes: After every N minutes, the system will alert again if the abnormality is still there
- Stop at the landmark:

+ Enable warning: Receive warnings when the vehicle stops at the milestone for more than the specified time when creating the milestone if this feature is enabled (Applies separately to each device).
+ Reminder when abnormality occurs N times: If abnormality occurs N times, a reminder will be displayed
+ Cycle: Allows the user to select the reminder cycle for the warning. including
- Continuous (default): Continuously alert until the abnormality is gone
Once: Only alert once when an abnormality occurs
Repeat N minutes: After every N minutes, the system will alert again if the abnormality is still there
- Stop on the journey:

+ Enable warning: Receive warnings when the vehicle stops at the milestone for more than the specified time when creating the milestone if this feature is enabled (Applies separately to each device).
+ Reminder when abnormality occurs N times: If abnormality occurs N times, a reminder will be displayed
+ Cycle: Allows the user to select the reminder cycle for the warning. including
- Continuous (default): Continuously alert until the abnormality is gone
Once: Only alert once when an abnormality occurs
Repeat N minutes: After every N minutes, the system will alert again if the abnormality is still there
4.4. Fencing Area Warning
- Warning stop outside area

+ Enable warning: Receive warnings when the vehicle stops at the milestone for more than the specified time when creating the milestone if this feature is enabled (Applies separately to each device).
+ Reminder when abnormality occurs N times: If abnormality occurs N times, a reminder will be displayed
+ Cycle: Allows the user to select the reminder cycle for the warning. including
- Continuous (default): Continuously alert until the abnormality is gone
Once: Only alert once when an abnormality occurs
Repeat N minutes: After every N minutes, the system will alert again if the abnormality is still there
- Geofencing warning:

+ Enable warning: Receive warnings when the vehicle meets abnormal conditions according to the settings in Settings/Warning Settings/Electronic Zoning if this feature is enabled (Applies separately to each device).
+ Reminder when abnormality occurs N times: If abnormality occurs N times, a reminder is displayed
+ Cycle: Allows the user to select the reminder cycle for the warning. including
- Continuous (default): Continuously alert until the abnormality is gone
Once: Only alert once when an abnormality occurs
Repeat N minutes: After every N minutes, the system will alert again if the abnormality is still there
4.5. Maintenance and reminders
- Reminder alert

+ Enable warning: Receive warnings when the vehicle stops at the milestone for more than the specified time when creating the milestone if this feature is enabled (Applies separately to each device).
+ Cycle: Allows the user to select the reminder cycle for the warning. including
- Continuous (default): Continuously alert until the abnormality is gone
Once: Only alert once when an abnormality occurs
Repeat N minutes: After every N minutes, the system will alert again if the abnormality is still there
4.6. DVR Driver's license number is abnormal
- Driving information:

+ Enable warning: Receive warnings when the vehicle has a DVR device installed but the driver information is not installed or installed but the driver's license number and RFID are expired in Settings/Basic information if this feature is enabled (Applies separately for each device).
+ Cycle: Allows the user to select the reminder cycle for the warning. including
- Continuous (default): Continuously alert until the abnormality is gone
Once: Only alert once when an abnormality occurs
Repeat N minutes: After every N minutes, the system will alert again if the abnormality is still there
4.7. Car type nitification popup
- Car type information:

+ Enable warning: Receive warnings when the vehicle has not set up Vehicle Type information (Toll station/Maximum speed management) in Settings/Basic information/Vehicle information if this feature is enabled (Applies separately for each device).
+ Cycle: Allows the user to select the reminder cycle for the warning. including
- Continuous (default): Continuously alert until the abnormality is gone
Once: Only alert once when an abnormality occurs
Repeat N minutes: After every N minutes, the system will alert again if the abnormality is still there
4.8. Route tracking warning
- Route tracking warning: Allows setting up warnings when the vehicle deviates from the prescribed route set up in the Quick Route Creation function inMap page. View the route in the Route Monitoring function in Search Map

4.9. Driver working hours warning: Driver driving time view on web, Email, Vietnam FMS app and Edriver app
- Same-day estimate driving time: The time the vehicle loses signal, compensates for sending signals... will be estimated and added to the driving time. For example: The vehicle runs from 8am to 9am, from 9am to 9:30am the vehicle loses signal, then gets signal again and runs until 10am, the time the vehicle loses signal will be added to the driving time, the total driving time is 2 hours.

+ Enable warning: Enable/disable warning (Applies by account)
- EDriver Application alert: Driving time warning on Edriver

+ Enable warning: Turn on/off warning (Applies by account)
+ Ringtone:
* When violating, a warning will be sent to the phone including notification and warning sound. Warning once for each continuous violation/day/week and the warning content will be saved in the "Notification" section on the Edriver app.
- Early Warnings: Warning before driving time violation, warning time set by user

+ Enable warning: Enable/disable warning (Applies by account)
+ Set time on report page: Set warning time how many minutes earlier than the violation time
- Continuous driving time

+ Enable warning: Turn on/off warning (Applies by device)
+ Reminder when abnormal...times: If abnormal occurs N times, display reminder, default N= 1
+ Set time on report page...Hour...Minute: Set violation time
+ Cycle: Allows user to choose reminder cycle for warning. including
- Continuous (default): Continuously alert until the abnormality is gone
Once: Only alert once when an abnormality occurs
Repeat N minutes: After every N minutes, the system will alert again if the abnormality is still there
- Day driving time

+ Enable warning: Turn on/off warning (Applies by device)
+ Reminder when abnormal...times: If abnormal occurs N times, display reminder, default N= 1
+ Set time on report page...Hour...Minute: Set violation time
+ Cycle: Allows user to choose reminder cycle for warning. including
- Continuous (default): Continuously alert until the abnormality is gone
Once: Only alert once when an abnormality occurs
Repeat N minutes: After every N minutes, the system will alert again if the abnormality is still there
- Weekly driving time

+ Enable warning: Turn on/off warning (Applies by device)
+ Reminder when abnormal...times: If abnormal occurs N times, display reminder, default N= 1
+ Set time on report page...Hour...Minute: Set violation time
+ Cycle: Allows user to choose reminder cycle for warning. including
- Continuous (default): Continuously alert until the abnormality is gone
Once: Only alert once when an abnormality occurs
Repeat N minutes: After every N minutes, the system will alert again if the abnormality is still there
General Department of Information Transmission (QCVN)
I. Purpose
-
Allows users to set up information to be transmitted to the Police Department according to the provisions of law.
II. Implementation conditions
-
The user is authorized to perform the General Department of Information Transmission (QCVN) function . This page is only available on the admin account.
III. Implementation instructions
-
Go to Settings menu / General Department of Information Transmission (QCVN)
-
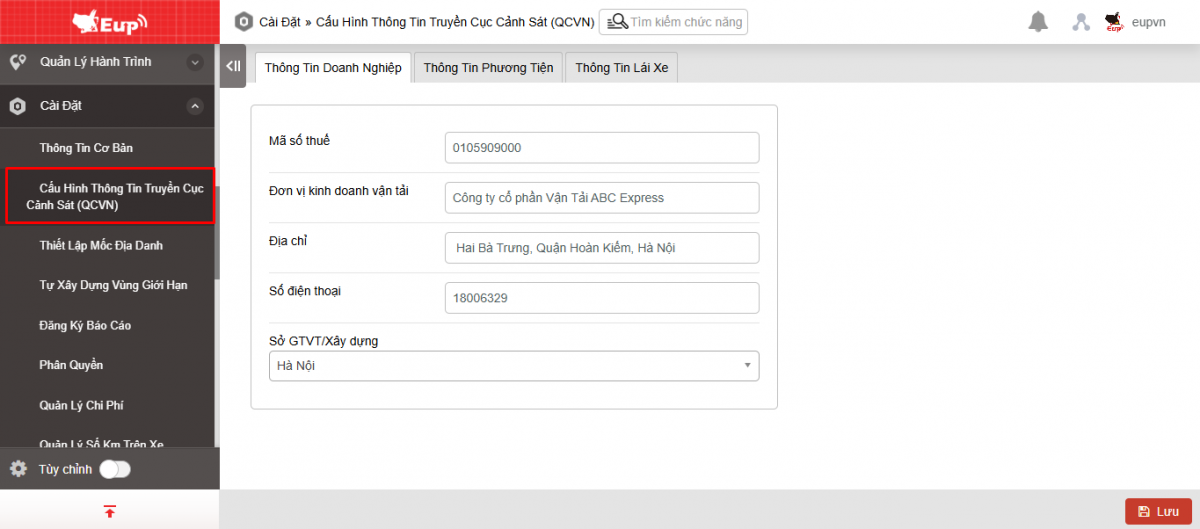
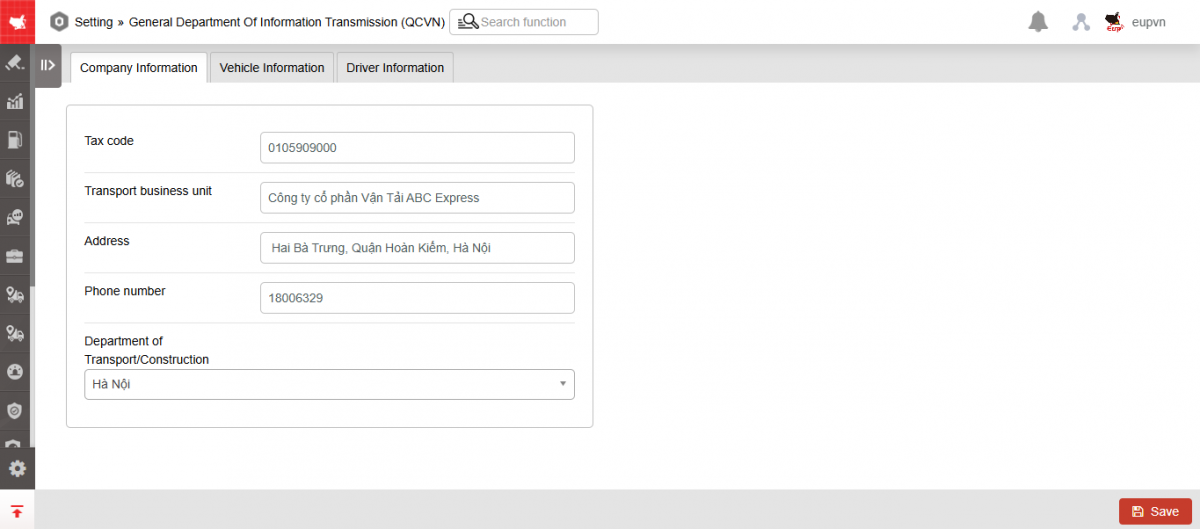
The screen displays 3 tabs: Company Information, Vehicle Information, Driver Information
+ Tab Company Information includes the following information:
-
Tax code
-
Transport business unit
-
Address
-
Phone number
-
Department of Transport/Construction
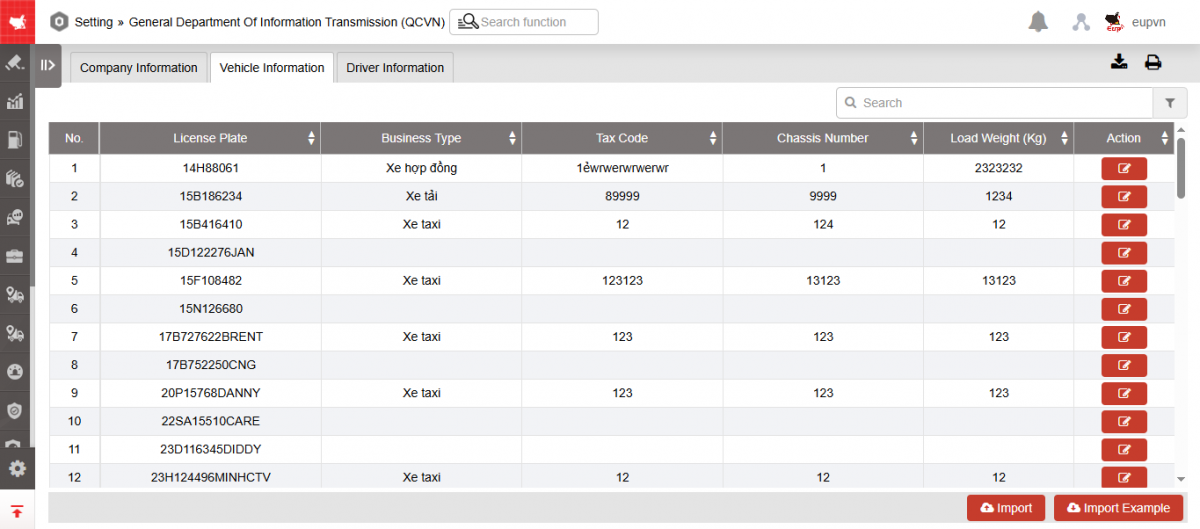
+ Tab Vehicle Information:
-
License plate
-
Business type
-
Tax code
-
Chassis number
-
Load weight (kg)
-
Action: Edit vehicle information
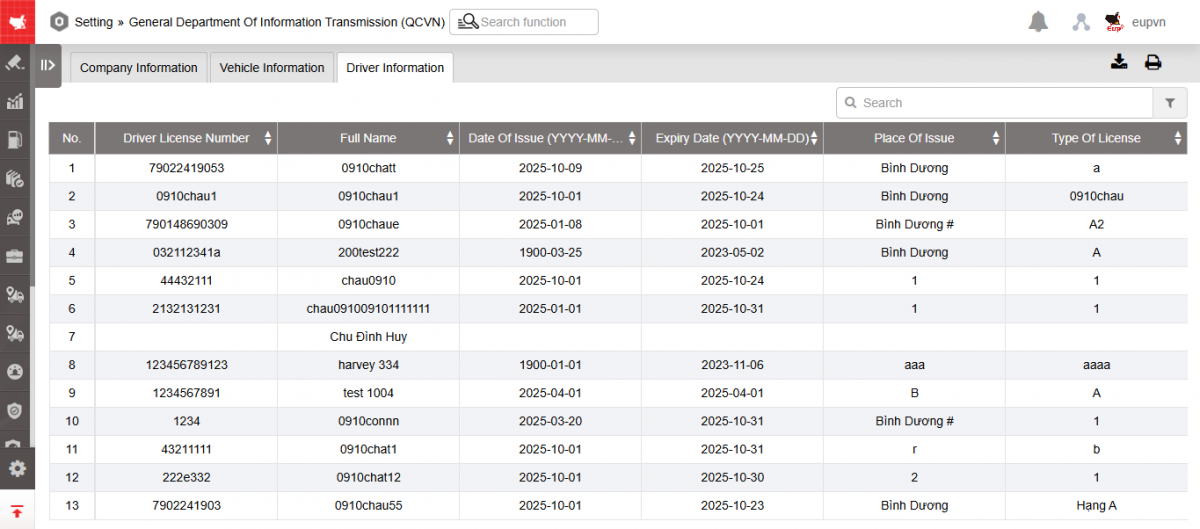
+ Driver information tab gets information from Name list tab in Setting/Basic setting
* To display the driver list in the Name list tab , the user needs to install at Setting/Basic setting/Tab Name list
-
Driver license number
-
Full name
-
Date of issue (YYYY-MM-DD)
-
Expiry date (YYYY-MM-DD)
-
Place of issue
-
Type of license
Landmark Setting
1. Purpose
- Support users to create and manage points that vehicles need to pass through, thereby providing a basis for electronic zoning and checking whether the vehicle is following the set route or not
2. Implementation conditions
- Users are authorized to perform the function of Landmark setting.
3. Implementation instructions
- Go to the Setting/Landmark setting.
The display function screen consists of 3 parts:
+ Create Landmark section: allows users to search and locate locations to create new landmarks associated with each vehicle. Supports looking up the vehicle's travel history by time period
+ Landmark Management section: Supports statistics, editing, and deleting landmarks created on the system
+ Manage Landmark Icons section: allows users to use images to symbolize landmarks.
- Create Landmark section: Supports creating landmarks in areas near existing landmarks, near defined addresses/locations, near defined vehicles.
- Determine the area to create a landmark in the following ways
- Enter the Landmark Name or click to select the landmark in the displayed list to locate the landmark on the map
- Enter the Address or Coordinates information, then press Locate to perform at the landmark in the corresponding area

-
- Enter Vehicle information, time period From To then press Search to look up vehicle travel history to support creating milestones at the corresponding points the vehicle passes.

- Right click and select Create milestone, enter milestone information according to the display screen:

Select Save to add a new milestone
- Landmark Management section

- Select the milestone line to edit/delete
Select Edit, enter the information to be edited into the milestone editing screen and Save to update

- Select Delete, at the confirmation screen select Yes to delete the milestone

-
Select the icon
 to download the sample file and fill in the information to upload the file:
 - Then select the icon
 to upload the file you just filled in the information to the system.
 - After uploading the file, it will display a success and failure message of how many records, click Download to download the file displaying the content of the Error Message.

- Manage Landmark Icons section

- Select the icon
 to edit the landmark icon
 - Select the icon
 to add a new landmark icon
 - Select the icon
 to delete the landmark icon
- Log in to post comments
- Tiếng Việt
- 繁體中文
Fencing Area Setting
1. Purpose
- Allows users to edit and delete the limited area that has been built in the function of Zoning by limit in the Map page
2. Implementation conditions
- Users are authorized to the function of Fencing Area Setting in the authorization section
3. Implementation instructions
- Go to the menu Setting/ Fencing Area Setting

The function display screen consists of 2 parts:
+ Fencing Area Setting section: displays the set restricted areas.
+ Modify Fencing Area section: allows users to modify restricted area settings.
- Fencing Area Setting section:

Name: Set by the user
Type: Displays the corresponding category when creating a restricted area on the Map page (Restricted area/Factory)
Description: Entered by the user when creating a restricted area
Geofencing: Displays this column if the Electronic zoning checkbox is selected when creating a zoning
Account Created: Account performing the creation of the restricted area
Delete: Selects the line of information about the restricted area to be deleted. Press the Delete button to delete the information
- Modify Fencing Area section: Select the limit area to be edited. Press the icon
 , the screen displays as follows:

Save: Select to save the newly updated information for the restricted area
Previous: Select to return to the previous area
Clear: Select if you want to cancel all the edits you just entered
- Log in to post comments
- Tiếng Việt
- 繁體中文
Set up Maintenance Check and Reminder alerts (New Message for Customer 12333, 13900)
1. Purpose
- Allows users to set up abnormal displays and notify users when maintenance is due
2. Implementation conditions
- Users are authorized to configure on/off New warning display in the Abnormal settings function in the authorization section
3. Implementation instructions
- The Warning Settings section includes 2 sections:
+ Section 1: General Configuration: General settings apply to all warning groups

- Warning on applications: When there is an abnormality, a reminder will be displayed when setting up to enable warnings on the web, app, email, sms, device warnings
- Applies to all devices: When there is an abnormality, a reminder will be displayed on all devices
- Receive warnings from vehicles: Configure vehicles to receive warning reminders
- Click Save to save the information just installed
+ Section 2: Setting up alert groups
Setting up for Maintenance Groups and Check Reminders
+ General Settings for Alert Groups
-
Notification: Displays a warning bell in the upper right corner of the screen at the interval set in the Settings for each alert. The popup will display as follows:
-
Click the X, the Seen button or anywhere on the screen to turn off the popup notification: The popup will appear after each log in
-
Check the No more reminders today checkbox: The reminder will not repeat until 23:59:59
-
Select the cycle Continuous: The popup will reappear after each log in
-
Select the cycle Repeat: After how many minutes set and log in again will the popup appear
-
Select the cycle Once: The popup will only appear once
-
- Global configuration settings: when enabled, alerts will follow the global configuration settings for all groups
- App alerts: enabled apps, when logged in with the same account, will receive alerts
- Apply to all devices: all devices logged in with the same account will receive alerts
- Receive alerts from vehicles: selected vehicles will display alerts when the vehicle violates the alert setting limit
Report Subscription
1. Purpose
- Support users to register to receive email reports by time of Day, Week, Month as registered
2. Implementation conditions
- Users are authorized to the Report Subscription function in the authorization section
3. Implementation instructions
- Go to the Report Subscription/Setting

- The display function screen consists of 2 parts:
- Report Subscription details section: Includes information about the list of reports registered by the user
- Add/Edit/Delete section: allows users to add new, edit, delete reports registration

The Report Subscription details section displays the following information:
- Report name: Entered by user
- Report Frequency: User Selects Report Period: Daily, Weekly, Monthly
- Team: User Selects Team to View Report
- Format: Select Report Format to Send via Email
- Report Type: Select Report Type to Send via Email
- Recipient: Email of Report Recipient
Add/Edit/Delete Section
- Select Add to subscribe to receive reports. The Add subscription screen is as follows

- Select the report information line that needs to be edited and press the Edit button. The editing screen is as follows:

- Select the report information line to delete and press the Delete button. The delete screen is as follows:

- Select OK to delete the report receipt information
- Select Cancel to cancel the deletion of the report receipt information
- Log in to post comments
- Tiếng Việt
- 繁體中文
Permissions Setting
1. Purpose
- Supports the system Admin to monitor and assign the following rights to users: Account, System function, Vehicle monitoring.
2. Implementation conditions
- Users are authorized to the Permissions Setting function in the authorization section
3. Implementation instructions
- Go to the Permissions Setting/Setting

-
The function screen displays 3 parts:
-
Account Information section supports managing detailed account information such as password, expiration date, number of logins
-
Edit section: Allows setting up System function options, Vehicle monitoring settings, Customer authorization configuration
-
Add/Edit/Delete section: supports users to add new, edit, delete permissions for other user accounts and count the number of logins
-
Account Information section:

-
-
Name
-
Account: User login account name
-
Password: User account login password;
-
Main factory area: Account main factory name
-
Expiration date: Account expiration date. If the account is not renewed after this time, it will not be possible to log in to the system
-
View reports from date, View reports to date: Within the specified time period, the child account is allowed to view the report, outside of the above time period, the data cannot be looked up (Cannot select the date to look up the report, can only view Map page)
-
Monitoring time: Set the time period to view the Temperature Graph and Trip History reports by time frame, outside of the set time frame, you can still log in but cannot view the report. Authorized accounts can only view the Temperature Graph and Trip History (Need to request to open this feature on the system to display this item)
-

-
-
Login Count: Number of times the user logged into the system
-
Last Login Time: Time of the account's last login to the system
-
Time Zone: Time zone of the system login
-
Edit Section
-
Press the button
 to perform the System Function Options setting. The Functions screen displays a list of basic and advanced system functions that Admin can assign to the account. The Function Options screen is as follows:

-
The user selects the function line that needs to be authorized, clicks on the icon when he wants to add permissions for the user and clicks on the icon
 when he wants to cancel the permissions for that function of the user. Then select Save to save the results just performed
-
Press the button
 to set up Cars Monitoring Settings up Vehicle Monitoring allows the Admin to assign vehicle monitoring permissions to the account according to the managed vehicle fleet. The Vehicle Monitoring screen is as follows:

- User selects the icon
 to cancel the monitoring authorization for each vehicle or the icon to cancel the monitoring authorization for all vehicles currently authorized to monitor
 -
User selects the icon
 to authorize monitoring for each vehicle or the icon to authorize monitoring for all vehicles in the list.
 -
Then select Save to save the results just performed
-
Press the button
 to perform Customer authorization configuration. Customer authorization configuration allows Admin to authorize customer monitoring for accounts according to the managed vehicle fleet. The Customer authorization configuration screen is as follows:

-
The user selects the icon to
 cancel the monitoring authorization for each customer or the icon to cancel the monitoring authorization for all customers currently being authorized to monitor
 -
The user selects the icon
 to authorize the monitoring of each customer or the icon to authorize the monitoring of all customers in the list.
 -
Then select Save to save the results just performed
-
Click the button
 to perform Driver Authorization Configuration. Driver Authorization Configuration allows Admin to authorize driver supervision for accounts according to the managed fleet. The Driver Authorization Configuration screen is as follows:

- Add/Edit/Delete section: Popup table includes the following information:
-
Monitoring time: Set the time frame for viewing online monitoring, the child account is only allowed to view the Map page and Multi-vehicle Map pages within the selected time frame, outside the authorized time frame the account will not be able to log in..
-
-
Select Add to add a new account to the system. The Add Account screen is as follows:

-
Select the line of the account whose information needs to be edited and press the Edit button. The editing screen is as follows:

-
Select the line of the account to be deleted and press the Delete button. The system displays the message:

-
Select OK to delete the account
-
Select Cancel to cancel the account deletion
Group Management Tab
When assigning vehicles and permissions, accounts in this group will have the same number of vehicles and permissions.

When creating a new authorization account, you can choose a group:

- Log in to post comments
- Tiếng Việt
- 繁體中文
Basic Setting Car Odometer
1. Purpose
- Allows users to enter and track the number of kilometers on the vehicle's odometer by day of the month
2. Implementation conditions
- Users are assigned option VN71 in the authorization section
3. Implementation instructions
- Go to Setting/Basic Setting Car Odometer

- The display function screen consists of 2 parts:
+ The Search section allows users to set time parameters and vehicles that need to view the report;
+ The Basic Setting Car Odometer section displays detailed information about the number of kilometers the vehicle has traveled each day

+ Search section: To view the report, users select the following information:
- Select month: Select the month the user needs to look up;
- All Team: Default to the entire fleet. Select the icon
 to select the team;
 - All Car Group: Default to the entire group. Select the icon
 to select the group;
 - All Car Symbol: Default to the entire symbol. Select the icon
 to select the symbol;
 - Vehicle list: The user ticks the checkbox to select the vehicle to look up the report;
- Click Search to display
+ Basic Setting Car Odometer section: Allows users to view and enter all detailed information about the number of kilometers the vehicle travels per day, specifically:
- Plate number;
- Driver;
- Date 1, Date 2: Number of kilometers on the vehicle's odometer for each day of the month
- User double-clicks on the vehicle line and the date box needs to add information about the number of kilometers to enter the number of kilometers on the vehicle's odometer then select Save

- Log in to post comments
- Tiếng Việt
- 繁體中文
Cost Management
1. Purpose
- Support users to track additional vehicle costs such as vehicle insurance costs and maintenance costs.
2. Implementation conditions
- Users are authorized to the Cost Management function in the authorization section
3. Implementation instructions
- Go to the Cost Management/Setting

The display function screen consists of 3 parts:
- The Fleet Information section allows users to set up time parameters and vehicles that need to view the report;
- The Cost Management section displays detailed information on vehicle costs incurred at the time of the report lookup
- The Current Cost section displays detailed costs incurred for the vehicle installed at the current time

Fleet Information Section: To view the report, the user selects the following information:
- From: The user enters the first day to create the report;
- To: The user selects the last day to create the report;
- All Car Groups: The default is the entire car group. Select the icon to select the car group;
- All Car Symbol: Default is all vehicle symbol. Select an icon to select the vehicle type;
- Vehicle List: The user checks the box to select the vehicle to look up the report;
- Click Search to display the report in the Cost Management section
The Cost Management section displays detailed information on vehicle costs incurred at the time of report lookup. Including information:
- Plate number
- Driver
- Cost Type: Cost Name (Example: Gasoline, Insurance,...)
- Content Purchase: Corresponding Purchase Content (Example: Gasoline, Car Insurance,....)
- Supplier: Supplier Name
- Quantity: Quantity of the cost type
- Unit Price: Unit Price of the cost type
- Cost: Calculated by Quantity * Unit Price
- Cost Date: Time of purchase of the expense type
- Expiration Date: Expiration date of the expense type
- Reminder Date: Expiration date of the expense type
- Start Km: Number of Km at the starting time
- Norm Km: The number of kilometers traveled corresponding to 1 liter of fuel set by the user.
- Reminder Km: Number of Km that will be reminded by the user
- Current Km: The number of kilometers the vehicle has traveled from the date of device installation to the date of payment
- Notes
The Current Cost section displays detailed information about the current cost of the vehicle, including information such as Cost Management

-
- User selects Add to add new cost information. The Add screen is as below:

-
- The user selects the line to edit information then presses Edit. The edit screen is as follows:

-
- The user selects the line to delete and then presses Delete. The system displays the warning information as below. Press OK if you want to delete the information, press Cancel if you do not want to delete the information.

- Select Import Example file to download the cost information sample according to the list
- Select Batch import to upload cost information according to the list
- Log in to post comments
- Tiếng Việt
- 繁體中文
Car accessory management
1. Purpose
- Support users to enter and track information related to vehicle spare parts.
2. Implementation conditions
- Users are authorized to the Car Accessory Management function in the authorization section
3. Implementation instructions
- Go to the Car Accessory Management/Setting

- The function screen includes 3 parts:
- Fleet Queries section allows users to set up time parameters and vehicles to view the report;
- The detailed report part of vehicle spare parts information
- The Settings/Add/Delete/Edit part allows adding/editing/deleting vehicle spare parts information

Search section: the user selects the following information:
- All teams: Default, user selects the icon
 to select a team
- All Car Groups: The default is the entire car group. Select the icon to select the car group;
- All Car Symbol: Default is all vehicle symbol. Select an icon to select the vehicle type;
- Vehicle List: The user checks the box to select the vehicle to look up the report;
- Press Search to display results
The Car Accessory Management section includes the following information:
- Plate number:
- Accessory: Accessory' name (Example: Tire, battery,....)
- Serial number: Serial number of spare part
Settings/Add/Delete/Edit: Supports users to enter and track spare parts of each vehicle. To enter spare part information for the vehicle, users perform the following steps:
- Setting acessory type: Support users to set up the types of spare parts that need to be tracked.

- Select the Add button to Add a new spare part type. Then press Save
- Add the corresponding spare part information for the vehicle in two ways
+ Add by list by doing:
- Import Ẽample: Select Sample File to get a sample file to enter vehicle spare parts information according to the list
- Batch Import: Select to add spare parts information corresponding to the vehicle according to the list
+ Add by list by doing:
- Add: Select to Add the corresponding spare part information for each vehicle. The Add function screen is as follows:

- User enters information:
- Plate number: Select the license plate in the tracking list
- Accessory: Display the list of accessories set up in the Car Accessory Management section
- Serial Number: Enter the tracking serial number
- Click Save to update spare part information
- Edit: Select the information line, click Edit to edit the spare part tracking information

- Delete: Select the information line and press Delete to delete the spare part tracking information.

- Select Yes to delete the report receipt information
- Select No to cancel the deletion of the report receipt information
- Log in to post comments
- Tiếng Việt
- 繁體中文
Cost Management (KH 22123 - Vietstar Company)
1. Purpose
- Allows users to track additional vehicle costs such as vehicle insurance costs and maintenance costs.
2. Implementation conditions
- Users are authorized to Cost Management
3. Implementation instructions
- Go to the Setting/Cost Management menu

- The display function screen consists of 3 parts:
+ The Fleet Queries section allows users to set up time parameters and vehicles that need to view the report;
+ Cost Management section displays detailed information on vehicle costs incurred by the time of the report lookup
+ Current Cost section displays detailed costs incurred for the vehicle installed at the current time

+ Fleet Queries section: To view the report, users select the following information:
- From: User enters the first day to create the report;
- To: User selects the last day to create the report;
- All Team: Default to the whole team. Select the icon to select the vehicle team;
- All Car Symbol:
- Click Search to display the report in the Cost Management section.
+ Cost Management section displays detailed information on vehicle costs incurred at the time of report lookup. Includes information:
- Plate Number
- Driver Name
- Cost Type: Cost Name (Example: Gasoline, Insurance,...)
- Content Purchased: Corresponding Purchase Content (Example: Gasoline, Car Insurance,....)
- Supplier: Supplier Name
- Quantity: Quantity of the cost type
- Unit Price: Unit Price of the cost type
- Cost: Calculated by Quantity * Unit Price
- Discount: Discounted Amount
- Cost after discount: Cost - Discount
- VATENU
- Total VAT: Cost after discount * VAT
- Total After VAT: Cost after discount + Total VAT
- Cost Date: Time of purchase of expense type
- Expiration Date: Expiration date of expense type
- Remind Date: Expiration date of expense type
- Starting km: Number of km at the time
- Norm km: Number of km traveled corresponding to 1 liter of fuel set by the user
- Remind km: Number of km to remind set by the user
- Current Km:
- Notes
+ Current Cost section: displays detailed information about current vehicle costs, including information such as Cost Management

- NSD selects Cost Type Setting to set up a list of cost types.

- User selects Batch import to upload the file with entered cost information to the system
- User selects Import example download the sample file to fill in information and upload the file to the system
* Example file: When entering duplicate data, the latest data will be received. Open option VN31A to check for duplicate information of Cost Date, Plate Number, and Supplier when uploading the cost management file (Error notification if all 3 information are duplicated)
- Select Add to add cost information:
- Enter the information fields and add the required Plate number
- The screen displays as below:

* When adding duplicate data, it will be updated into 2 identical newsletters.
- The user selects the line to edit information then presses Edit. The editing screen is as follows:

- The user selects the line to delete and then presses Delete. The system displays a warning message as below. Press OK if you want to delete the information, press Cancel if you do not want to delete the information.

Car Accessory Management (Customer 22123 - Vietstar Company)
1. Purpose
- Allows users to enter and track information related to vehicle spare parts.
2. Implementation conditions
- Users are authorized to Car Accessory Management in the authorization section
3. Implementation instructions
- Go to the menu Setting/Car Accessory Management

- The function screen consists of 3 parts:
+ The Search section allows users to select vehicles to search
+ The Filter by date section: Support users to filter search results according to due information
+ The Car Accessory Management section displays detailed information about vehicle spare parts
+ The Setting accessory type/ Batch import/ Import Example/ Add/Edit/Delete section allows adding/ editing/ deleting information about vehicle spare parts

+ Search section: User selects the following information:
- All Team: Default to the whole team. Select the icon
 to select the vehicle team;
 - All Car Symbol:
- Click Search to display the report in the Car Accessory Management section.
+ The Filter by date section

- From: User enters the first day to create the report;
- To: User selects the last day to create the report;
- Undue
- Due soon
- Expired
+ The Car Accessory Management section including information:
- Plate
- Accessory: Name of accessory (Example: Tire, battery,...)
- Warranty end date: Next warranty date
** If the user enters the monthly cycle in the Spare Part Type Settings, the Warranty Expiration Date will be automatically displayed according to the principle of Warranty End Date = Replacement Date + Monthly Cycle.
If the monthly cycle is set, the Warranty Expiration Date will be automatically displayed, but the user can still customize the Warranty Expiration Date as desired.
- Replacement Date: Last replacement date
- Type
- Cost: Enter Amount
- Current Km: Km at Last Replacement Time
- Due Km: Km due for next warranty
** If the user enters the cycle in km in the Spare part type settings, the due km will be automatically displayed according to the principle of due km = current km + cycle in km.
If the cycle is set in km, the due km will be automatically displayed, the user can still customize the due km as desired
If the user does not enter the current km, it will be taken according to the current km on the system (km from the time of installation of the locator until now)
- Notes
- Colors shown in the Warranty End Date column on the report:
- White: Not yet due
- Yellow: Due soon (10 days notice)
- Red: Expired (Date past until current time)
+ The Setting accessory type/ Batch import/ Import Example/ Add/Edit/Delete section: Support users to enter and track spare parts for each vehicle. To enter spare parts information for a vehicle, users perform the following steps:
- Setting accessory type: Allows users to set up spare part types that need to be monitored and set up warranty expiration cycles by month and km. Select the Add button to add a new spare part type. Then press Save.

- Add the corresponding spare part information for your vehicle in two ways:
- Add by list by doing:
Step 1: Import Example: Select Import Example to get example file to enter spare part information of the vehicle according to the list
Step 2: Batch import: Select list to add spare parts information corresponding to the vehicle
-
- Add each vehicle by selecting the Add button to add the corresponding spare part information for each vehicle.
The Add function screen is as follows:
- Add each vehicle by selecting the Add button to add the corresponding spare part information for each vehicle.

Step 1: User enters information:
Plate number: Select the license plate in the tracking list
Accessory: Display the list of spare parts types set up in the Spare parts type settings
Fill in other information such as: Warranty and date, Replacement date, Type, Cost, Current km, Due km, Notes
Step 2: Click Save to update spare parts information
- Edit: Select the spare parts information line in the Setting accessory type section. Click Edit to edit spare parts tracking information
** When the user edits, it will be updated into 1 more news and displayed on the report as the latest news based on the Plate number + Accessory + Update time. The old news will be saved and reviewed when using the Filter by Date function.

- Delete: Select the spare part information line in the Setting accessory type section. Click Yes to delete the spare part tracking information.

Container Priority Level
1. Purpose
- Allows users to set up vehicles and priority container order assigned to vehicles.
2. Implementation conditions
- Users are granted Container Priority Level permission on the CRM system.
3. Implementation instructions
- Go to the Setting/Container Priority Level menu

- The function screen displays 2 parts:
+ The Priority section allows setting up priority vehicles
+ The Batch Import, Import Example, Add, Edit, Delete sections allow adding, editing, and deleting installed information.

+ The Priority section includes information:
-
Plate Number
-
Container Number: plate number of containers assigned to the vehicle
+ Btach import, add, edit, delete section:
- Select Batch import file to update the added information to the list in excel format
- Select Import example file to download sample information to import the container list in excel format
- Select Add to add information to the list

- Select Edit to change the vehicles assigned container priority

- Select the license plate number you want to delete, press Delete

- Log in to post comments
- Tiếng Việt
- 繁體中文
Car Grouping & Sharing
1. Purpose
- Allows to create vehicle groups, driver groups and set up vehicles and drivers belonging to different groups to support management
2. Implementation conditions
- Users are authorized to Car Grouping & Sharing functions in the authorization section
3. Implementation instructions
Go to the menu Setting/Car Grouping & Sharing
- The display function screen consists of 3 parts:
+ Share Setting section
+ Car Group Setting section: Displays the vehicle group list
+ Driver Group Setting section: Displays the vehicle group list
+ Car Group Setting section includes the following information:
- Car Group : Name of the car group created by the user
- Color
- Car Name
- Plate Number
- Button Add/Edit/Delete: Supports users to add/edit/delete car groups
Add new vehicle group: Allows users to add and update vehicles in the group. Users select the Add button and enter information for the vehicle group including Group name, Color, select vehicles in the list and press Save.
Select the vehicle group that needs to edit information and press the Edit button to edit information for the vehicle group, then press Save
Select the vehicle group to delete, press the Delete button then press OK to delete the existing vehicle group.
+ Driver Group Setting section includes the following information:
- Car Group:
- Color
- Driver
- Edit button: Supports users to edit driver groups
Select the vehicle group that needs to edit information and press the Edit button to edit information for the driver group, then press Save
- Log in to post comments
- Tiếng Việt
- 繁體中文
Asset & Supplies Management
1. Purpose
- Allows users to install and manage assets and materials of each vehicle.
2. Implementation conditions
- Users are authorized to Asset & Supplies Management on the CRM system.
3. Implementation instructions
Go to the menu Setting/Asset & Supplies Management

- The function screen displays 3 parts:
+ Fleet Queries section
+ Asset & Supplies Management section
+ Asset Type, Add, Edit, Delete section

+ Fleet Queries section: Allows users to search by asset type group
+ Asset & Supplies Management section:
- Asset Name
- Asset Type
- Asset Type Group
+ Asset Type, Add, Edit, Delete section allows you to add, edit, and delete installed information:
- Select the Asset Type setting to update the asset type to the pick list when adding new or editing information

- Select Add to update the report with new data

- Select the line to edit, click Edit to edit the information again.

- Select the line to delete, press Delete to delete data

- Select the icon to
 print the report;
 - Select the icon to
 download the report in excel/word format;
 - Select the icon to
 set the display or change the sort order of the report columns
- Log in to post comments
- Tiếng Việt
- 繁體中文
Factory & Supplies Price Management
1. Purpose
- Allows users to install and manage workshops and material prices for each vehicle.
2. Implementation conditions
- Users are authorized to Factory & Supplies Price Management on the CRM system.
3. Implementation instructions
- Go to the Setting/Factory & Supplies Price Management

- The function screen displays 2 parts:
+ Factory Management section
+ Supplies Price Management section

+ Factory Management section
- Factory Name
- Description
- The add, edit, delete factory section allows adding, editing, deleting installed information:
Select Add to add new data to the report

Select the line to edit, click Edit to edit the information again.

Select the line to delete, press Delete to delete data

+ Supplies Price Management section

- Supplies Name
- Unit
- Unit Price
- Approve Date
- The add, edit, delete material price section allows adding, editing, and deleting installed information:
Select Add to add new data to the report

Select the line to edit, click Edit to edit the information again

Select the line to delete, press Delete to delete data

- Select the icon to print the report;
- Select the icon to download the report in excel/word format
- Log in to post comments
- Tiếng Việt
- 繁體中文
Follow Up Repair And Maintenance
1. Purpose
- Allows users to manage and track vehicle maintenance and repair.
2. Implementation conditions
- Users are authorized to Follow Up Repair And Maintenance on the CRM system
3. Implementation instructions
- Go to the Setting/Follow Up Repair And Maintenance

- The function screen displays 5 parts:
+ Fleet Queries section
+ Add/Edit/Delete section
+ Maintenance Tracking section
+ Maintenance Big Repair section
+ Maintenance Simple Repair section

+ The Fleet Queries section allows users to select information about time, team, car group, vehicle type:
- All team: Default, users select the icon
 to select the team;
 - All car group: Default is all vehicles in the car group, users select the icon to select a specific car group;
- All car symbol
- From: The first day the user wants to check;
- To: The last day the user wants to check;
- Search: Select Search to display the results.
+ The Add, Edit, Delete section allows adding, editing, deleting installed information:
-
Select Add to add new data to the report

-
Select the line to edit, click Edit to edit the information again.

-
Select the row to delete, click Delete, press Yes to delete data, press No to cancel the operation

+ The etails section includes 3 tabs with the same contents:
- Date:
- Factory name: Select the workshop name that has been installed in the Workshop Management tab on the page Settings/Workshop Management and Material Prices
- Plate number:
- Driver;
- Start time:
- End time:
- Total repair time:
- Machine time, wattage, km:
- Repair content:
- Supplies name: Select the alternative item name that has been set in the page Setting/Asset & Supplies Management
- Quantity
- Labor cost (VND)
- Supplies cost (VND): Display the material cost that has been installed in the tab Management of Material Prices on the page Settings/Workshop Management and Prices
- Processing cost
- Executor
- Notes
Select the icon to print the report;
Select the icon to download the report in excel/word format;
Select the icon to set the display or change the sort order of the report columns
- Log in to post comments
- Tiếng Việt
- 繁體中文
Setting Reminder
1. Purpose
- Support users to configure reminder content, remind in advance how many days, how many kilometers, how many hours
2. Implementation conditions
- Users are authorized to Setting Reminder function in the authorization section
3. Implementation instructions
- Go to menu Setting/Setting Reminder

- The display function screen consists of 3 parts:
+ The Fleet Queries section allows users to select vehicles to search
+ The Setting Reminder section displays detailed information about installed reminders
+ The Set up/Import example/Batch import/Add section allows adding new types of reminders

+ The Fleet Queries section: The user selects the following information
- All Team: Default to the entire fleet. Select the icon
 to select the team;
 - All Car Group: Default to the entire group. Select the icon to select the group;
- All Car Symbol: Default to the entire symbol. Select the icon
 to select the symbol;
 - Vehicle list: Default all vehicle license plate, allows to select 1 or more vehicles to look up reminders
- Click Search to display
- Remind type: Default all. Users can choose the type of reminder they need to look up. When changing the Reminder Type, the system will automatically search for data again without having to press Search
- Notifications: Default all. Users can choose the Reminder they need to look up. When changing the Reminder, the system automatically searches for data without pressing Search
+ The Setting Reminder section: The system defaults to searching for all reminders of all vehicles up to the time of logging into the page, including the following information:
- Car Type Name
- Car Name
- Driver: Driver name corresponding to Plate number
- Manufacturing date
- Modified last date
- Exprired date
- Plate number
- Total mileage
- Remaining mileage
- Remind type: Reminder type currently set for the vehicle (Currently there are three types of reminders: Daily reminder, Km reminder, Hourly reminder)
- Notifications: Reminder name corresponding to the user's setting (Example: Personnel insurance expiration date, Next maintenance date, Tire maintenance km,...)
- Content: System suggestion corresponding to the user's setting
Reminder day: Start the maintenance reminder from the date... (Calculate the date based on the due date minus the Reminder before ? days. For example: The due date is 15/09/2020, set reminder 5 days in advance -> Maintenance reminder from 10/09/2020)
Reminder Km: Start the reminder when the vehicle runs (Standard km - Remaining reminder km). In case (Standard km - Remaining reminder km) <= 0, display the content Start the reminder when the vehicle runs 0 km
Reminder hour: Start the reminder when the vehicle works (Standard hours - Remaining reminder hours). In case (Standard hours - Remaining reminder hours) <= 0, display the content Start the reminder when the vehicle works 0 hours
- Double click on the form to view the reminder details and edit the maintenance time of each vehicle

+ The Set up/Import example/Batch import/Add section.
- Add reminder type: Press the Set up button to display the reminder type setting screen

Click Add to add reminder type
Notifications: Enter the corresponding reminder name (Insurance Expiration Date, Maintenance Expiration Date, ...)
Reminder Type: By default, reminder by day. Allows users to choose from 3 types of reminders: Day, KM, Hour
Pre-reminder parameters number of days, km, hour: required
Click Save to update the Reminder Type information
- Add reminder for each vehicle: Click Add to add reminder information
Reminder day

The default reminder type is Reminder Day
Reminder: Allows user to select installed reminders corresponding to Reminder Type
Vehicle list: Allows user to select vehicle to be reminded
Reminder KM

Reminder hour

* Display reminder content on Map
+ Reminder day: {Reminder} {Due date}
+ Reminder km:
Type 1: Vehicle exceeds maintenance level {Remaining km} km if remaining km <0
Type 2: Remaining km before maintenance {Remaining km} km if 0<= remaining km <= Remaining reminder km
+ Reminder by hour:
Type 1: Vehicle exceeds maintenance time {Remaining hours} Hour if Remaining hours <0
Type 2: Remaining hours before maintenance {Remaining hours} Hour if 0<= Remaining hours <= Remaining reminder hours
- Log in to post comments
- Tiếng Việt
- 繁體中文
Setting Reminder (new page)
1. Purpose
- Support users to configure reminder content, remind in advance how many days, how many kilometers, how many hours
2. Implementation conditions
- Users are authorized to option VN98L
3. Implementation instructions
- Go to menu Setting/Setting Reminder

- The display function screen consists of 3 parts:
+ The Fleet Queries section allows users to select vehicles to search
+ The Setting Reminder section displays detailed information about the installed reminders
+ The Set up, Update, Edit, Delete, Import example, Batch import section

+Fleet Queries section: User selects the following information
- All Team: Default to the entire fleet. Select the icon to select the team;
- All Car Group: Default to the entire group. Select the icon to select the group;
- All Car Symbol: Default to the entire symbol. Select the icon to select the symbol;
- Vehicle list: Default all vehicle license plate, allows to select 1 or more vehicles to look up reminders
- Click Search to display
- Exprired date
- Status
+ Setting Reminder section: The system defaults to searching for all reminders of all vehicles up to the time of logging into the page, including the following information:
- Plate number
- Reminder: The corresponding reminder name set by the user (Example: Personnel insurance expiration date, Next maintenance date, Tire maintenance km,...)
- Exprired Date: is the due date or maintenance date corresponding to the type of reminder entered by the user
- Status: displays 4 statuses including Not due, Due, Overdue, Completed based on the due date entered by the user. Not due status: when due date > current date. Due status: when due date = current date. Overdue Status: when due date < current date. Completed Status: when user enters the implementation date and only allows entering the implementation date < or = current date.
- Double click on the form to see the reminder details and maintenance time of each vehicle:

- Reminder name: set by the user in the Settings section
- Modified Last date: is the date the user performs maintenance, service, entered by the user (only allows entering the implementation date < or = current date)
- Exprired Date: is the due date/maintenance date corresponding to the reminder type entered by the user
- Reminder type: the reminder type being set for the vehicle (Currently there are three types of reminders: Daily reminder, Km reminder, Hourly reminder)
- Status: displays 4 statuses including Not due, Due, Overdue, Completed based on the due date entered by the user. Not due status: when the due date > current date. Due status: when the due date = current date. Overdue status: when the due date < current date. Completed status: when the user has entered the implementation date (the implementation date only allows entering < or = current date).
- Content: system reminder suggestions corresponding to user settings
Select the icon  to print the report;
Select the icon  to download the report in excel/word format;
Select the icon  to set the display or change the sort order of the report columns
+ Set up, Update, Edit, Delete, Import example, Batch import section.
- Add reminder type: Press the Set up button to display the reminder settings screen

Press Add to add reminder
Press Delete to delete reminder
Press Save to update set up information
Press Cancel to cancel reminder setting
- Update reminders for each vehicle: Click Update to add reminder information

- Plate number: Allows users to choose to update reminders for each vehicle
Default: when clicking Default, all data will be deleted and left blank

When Save successfully, the main tab will display the newly updated data and keep the old data that the user has not changed. The detailed tab will save the old news and create a new news including the newly updated data and keep the old data that the user has not changed
- Edit reminder for each vehicle: right-click on the news that the user needs to edit and select Edit, the Edit screen will appear as follows (Editing is only allowed in the main tab and in the latest news in the detailed tab)

Plate number: Allows users to choose to edit reminders for each vehicle
When Save successfully, both the main tab and the detail tab will save the newly edited data and keep the old data unchanged without the user changing it right on the selected edited news.
- Delete reminders for each vehicle: right-click on the NSD newsletter that needs to be deleted and select Delete, the Delete screen will appear as follows (only allows deleting old newsletters in the details tab)

Select Yes to delete the newsletter, or select No to cancel the operation
- Import example: Select Import example to get a sample file to import vehicle reminder information according to the list
- Batch import: Select Batch import to upload reminder information data to the list Setting Reminder page
Text Management
1. Purpose
- Allows users to install and manage words
2. Implementation conditions
- Users are authorized to Text Management on the CRM system.
3. Implementation instructions
- Go to the Setting/Text Management menu

- The function screen displays 2 parts:
+ Text Management section
+ Edit, Delete section

+ Text Management section:
- Allows users to quickly search, filter by default word/replacement word
- Origin text: The original word of the system
- Custom text: The word that has been changed by the user, replacing the original word of the system
+Edit, Delete section allows to add, edit, delete installed information:
- Select the line to edit, click Edit to edit the information again

- Select the row to delete, click Yes to delete data, click No to cancel the operation

- Log in to post comments
- Tiếng Việt
- 繁體中文
Data Format Custom Settings
1. Purpose
- The built feature is to meet the needs of changing the data format of time, date, number, and currency of each customer
2. Implementation conditions
- This is a public system function for all customers to use.
3. Implementation instructions
- Go to the Setting/Data Format Custom Settings menu

- The display function screen consists of 1 part:
The Data Format Custom Settings part displays the data types that can be set. Includes 5 types of configurable data: Date format configuration, Separator configuration, Number format configuration, Currency format configuration, Oil level configuration.

+ Datetime format settings:
Function: Configure all date and time used in the system.
- Date and time: Is the time display type that includes full information: Hour, day, month, year. The system default is yyyy/mm/dd hh:mm. In case the user wants to change other settings than the system default, they can choose other settings according to the following options as shown in the following image:

When the user changes the date and time selection, all functions on the system containing date and time information will change according to the format the user sets
- Date format: This is the time display type that only includes the information: Day, month, year. The system default is yyyy/mm/dd. In case the user wants to change other settings, the system default can choose other settings according to the following options as shown in the following image:

When the user changes the date selection, all functions on the system containing date information will change according to the format the user sets.
- Month format: Is the time display type that only includes information: Month, year. The system default is yyyy/mm. In case the user wants to change other settings than the system default, they can choose other settings according to the following options as shown in the following image:

When the user changes the month selection, all functions on the system containing month information will change according to the format the user sets
- Time format: This is the time data display type including information: Hour, minute, second. The system default is hh:mm:ss. In case the user wants to change other settings, the system default can choose other settings according to the following options as shown in the following image:

When the user changes the time selection, all functions on the system containing statistical time information will change according to the format set by the user.
- Statistic time format: This is the display type of statistical time data (parking time, Stopping without turning off the engine,...) including the information: Hour, minute, second. The system default is hh:mm:ss. In case the user wants to change other default settings, the system can choose other settings according to the following options as shown in the following image:

When the user changes the statistical time selection, all functions on the system containing statistical time information will change according to the format the user sets.
+ Separator format:
- Function: Configure the display style of numeric data, number separator in the system. If the user does not set, the system defaults to “.” to separate decimals, does not use thousands separator, and has 2 digits after the comma.
- Separator configuration allows the user to set the use of a dot (.) to separate thousands, use a comma (,) to separate decimals and vice versa. To suit the user's needs.
+ Number format settings: allows the user to set the use of thousands separator and the number of decimal places after the comma to be displayed.

+ Currency format settings:
Function: Configure the currency unit and format used in the system. Includes the following indicators:
- Currency unit (VND, USD,...)
- Use thousand separator (1,000; 100,000;...)
- Decimal places: Users can choose to round only or calculate in detail to the decimal parts.
- Currency format: How to display currency data on the system.
If the user does not set, the system will default to not using currency units.

+ Configure oil rating: This is the type of fuel level data display. In case the user wants to change the default settings, the system can choose other settings according to the options as shown in the following image:

After completing the installation, the user selects Save in the lower right corner to save the settings. A successful save will display a pop-up as shown.

Note: If the user does not need to change data, there is no need to install, the system will automatically use the default configuration.
- Log in to post comments
- Tiếng Việt
- 繁體中文
Config Warning
1. Purpose
- Allows users to set up email and phone number to receive general warnings for all vehicles in the system
2. Implementation conditions
- Users are authorized to Config Warning
3. Implementation instructions
- Go to the Setting/Config Warning menu.

- User enters email list, phone number will receive warnings of all vehicles in the system

- The user selects Save to save the entered information.
- After selecting save, all parking warning violations will be sent via SMS to the phone number, email or popup on the system.
* Note: To set the warning time for the entire system, the user enters the Setting/Alarm Setting function and sets up the information.
- Log in to post comments
- Tiếng Việt
- 繁體中文
Config Warning Team
1. Purpose
- Allows users to set up email information and phone numbers to receive alerts for each fleet.
2. Implementation conditions
- Users are authorized to use option VN55.
3. Implementation instructions
- Go to the Setting/Config Warning Team menu.

- The display function screen consists of 2 parts:
+ Fleet ist section;
+ Detailed information section.

+ Fleet ist section: Displays all vehicle fleets in the system (the corresponding vehicle fleet is a sub-account of the system). To add a vehicle fleet, the user enters the Settings/Authorization function to add a vehicle fleet
+ Detailed information section: Display email information and phone number that will receive alerts corresponding to each fleet.
- To enter email and phone number information, the user selects Edit. The input screen appears:

- User fills in email information, Phone number and selects Confirm to save the entered information.
- Log in to post comments
- Tiếng Việt
- 繁體中文
Temperature Setting
1. Purpose
- Allows users to set the allowable temperature threshold during the day
2. Implementation conditions
- Users are authorized VN78A
3. Implementation instructions
- Go to the Settings menu/ Set abnormal temperature warning
- The display function screen consists of 3 parts:
+ The Fleet Queries section allows users to set search parameters;
+ The Temperature Setting section allows users to set the allowable temperature threshold during the day.
+ Add, Edit, Delete section

+ The Fleet Queries section includes the following information:
- All team: Default, users select the icon to select the team;
- All car group: Default is all vehicles in the car group, users select the icon to select a specific car group;
- All car symbol
- Search: Select Search to display the results.
+ The Temperature Setting section displays the following contents:
- No.
- Plate number
- Start time: User selects hh:mm:ss
- End time: User selects hh:mm:ss
- Lower threshold: User selects temperature
- Upper threshold: User selects temperature
If the temperature is outside the upper or lower threshold in the Start time to End time range, a warning will be displayed when the warning is enabled in Setting/Alert settings (system_message_setting.html) and the warnings will be saved in the event history
+ Add, Edit, Delete section:
- To add a new temperature threshold setting in the time range, user selects Add, the new add screen displays as follows:

-
To edit the installation information, the user selects the information line to be edited, right-clicks to display the Edit button.

-
To delete installation information, the user selects the information line that needs to be edited, right-clicks to display the Delete button.

List Customer
I. Mục đích
- Cho phép NSD thực hiện thêm, sửa, xóa, thông tin khách hàng.
II. Điều kiện thực hiện
- NSD được phân quyền option VN27
III. Hướng dẫn thực hiện
- Vào menu Cài đặt/Danh sách khách hàng.

- Màn hình chức năng hiển thị gồm 3 phần:
+ Phần Thông tin khách hàng: Thiết lập các tham số tìm kiếm hành trình;
+ Phần Danh sách khách hàng: Hiển thị thông tin hành trình bao gồm tuyến đường, thông tin xe;
+ Phần Tải dữ liệu/File mẫu/Thêm/Sửa/Xoá hành trình: Hỗ trợ tải lên file excel, thêm mới, sửa hành trình hoặc xoá hành trình
-
Để thêm mới khách hàng, NSD chọn Thêm, màn hình thêm mới hiển thị như sau:
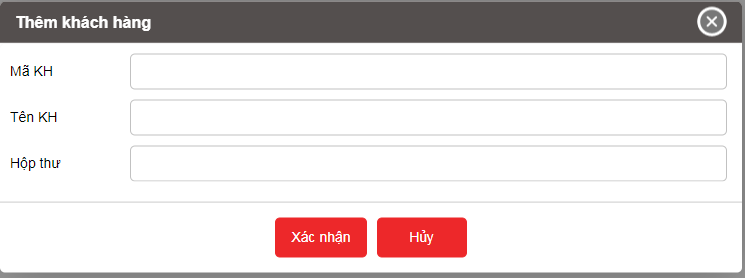
-
Xoá: NSD chọn khách hàng muốn xóa trên danh sách rồi bấm nút Xóa.
Turn Off Time Setting
1. Purpose
- Allows users to set the time period for the shutdown warning during the day
2. Implementation conditions
- Users are authorized to use option VN134
3. Implementation instructions
- Go to the Setting/Turn Off Time Setting menu

- The function screen consists of 3 parts:
+ The Fleet Queries section allows users to set up search parameters;
+ The Turn Off Time Setting section allows users to set the time period for the shutdown warning during the day.
+ The Add, Edit, Delete section

+ The Fleet Queries section includes the following information:
- All team: Default, users select the icon to select the team;
- All car group: Default is all vehicles in the car group, users select the icon to select a specific car group;
- All car symbol
- Search: Select Search to display the results.
+ The Turn Off Time Setting section displays the following contents:
- No.
- Plate number
- Start time: User selects hh:mm:ss
- End time: User selects hh:mm:ss
- Date: User selects the warning date
Note:
- This feature only re-specifies the time period that will be set for warning when the vehicle is turned off, all settings are still made in the Alert settings / Car status / Turn off long feature
- The time period set for warning of a vehicle will not be intersected
- Vehicles that do not set the warning time period will follow the settings in the Alert settings / Car status / Turn off long feature
+ Add, Edit, Delete section
- To add a new shutdown time setting, user selects Add, the new screen displays as follows:

-
To edit the installation information, the user selects the information line to be edited, right-clicks to display the Edit button.

-
To delete installation information, the user selects the information line that needs to be edited, right-clicks to display the Delete button.

Using NFC Write To The Driver's Card
1. Purpose
- Allows users to read and write data on driver swipe cards (RFID cards) to a single standard.
2. Implementation conditions
- Applicable to all customers.
- Users are authorized to use option VN119 to authorize sub-accounts.
- Users use the feature on the mobile app: Vietnam FMS.
3. Implementation instructions
- Go to menu Using NFC Write To The Driver's Card
- The function screen displays the Driver Information section (comboBox), allowing you to select the driver whose data needs to be recorded on the card:
+ The system displays the list of drivers entered in Setting / Basic Information / Name List.
- Only allows you to select drivers who have fully entered information: Driver name - Driver's license number.
+ Function key section Card read- Card write:
- Card read: The user presses the card read button then puts the driver's swipe card into the NFC receiving area of the mobile device for the system to start reading the card, the system displays a successful / unsuccessful reading notification and displays the read card information including Driver's name - Driver's license number.
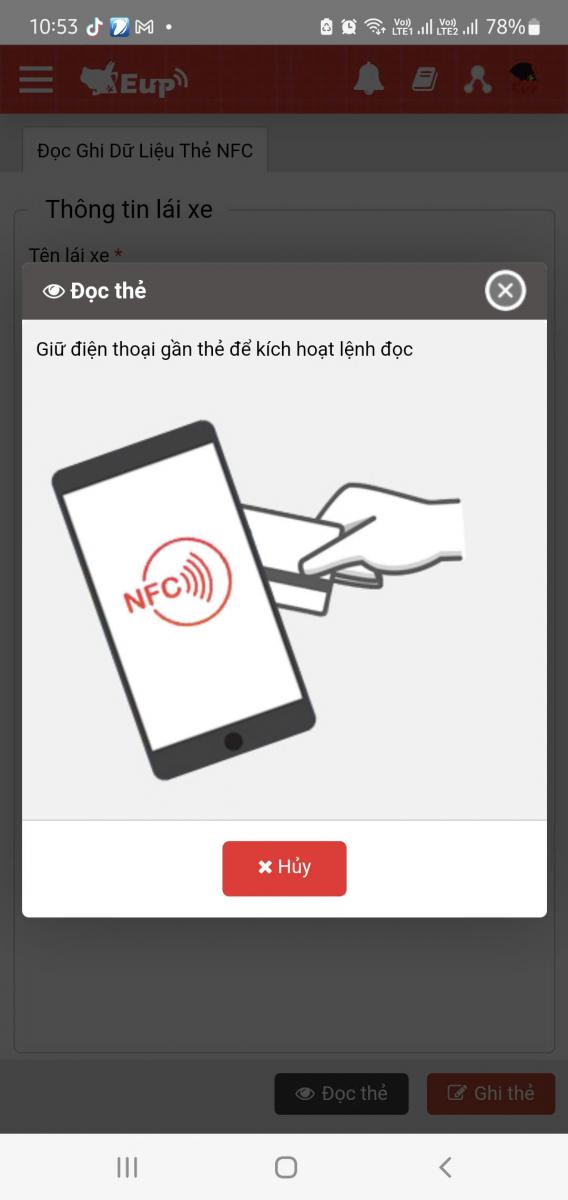
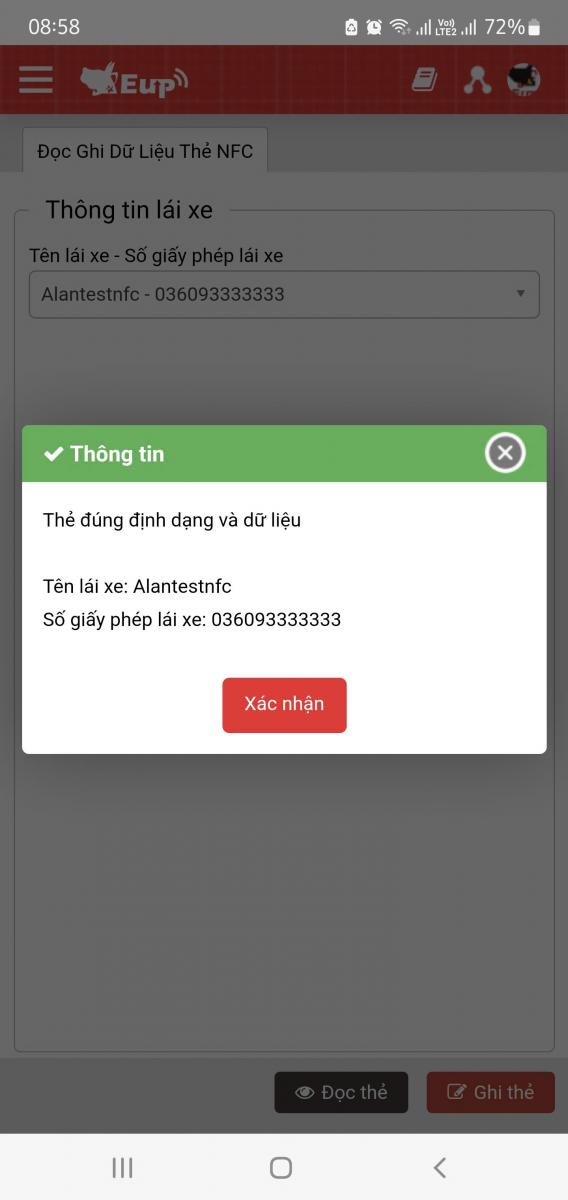
- Card write: To record the card, the user must select the driver in the driver information comboBox. Then the user will need to swipe the card into the NFC receiving area of the mobile device for the system to record the card.
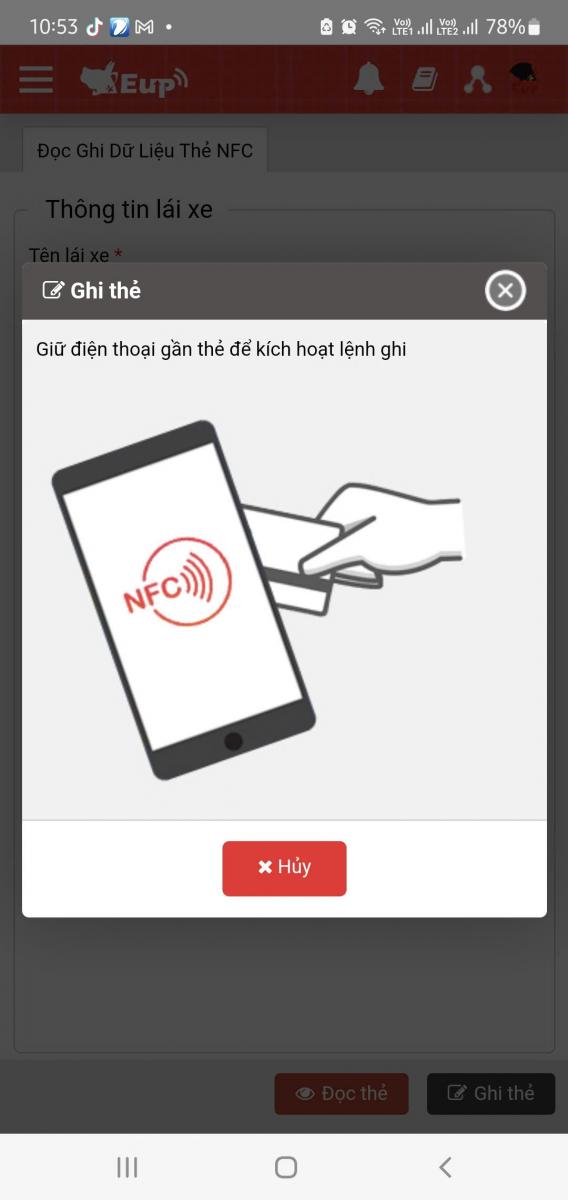
Note:
+ Mobile devices must support NFC and have NFC enabled to use this feature.
+ The NFC card data reading and writing feature is only used on mobile apps.
+ When reading or writing data on IOS apps, hold the swipe card in the NFC-enabled area of the device for 4 seconds.
+ Only drivers who have filled in the Driver Name - Driver License Number information in Setting / Basic Information / Name List can be selected.
+ The system will record the card to a single standard, used for all devices.