Driving Management
- Log in to post comments
- Tiếng Việt
- 繁體中文
Driving Authority
1. Purpose
- This function allows users to manage information about drivers, number of logins, most recent logins. At the same time, perform operations to manage drivers such as: adding new drivers, creating accounts for drivers on the Edriver app, granting permissions to allow drivers to participate in timekeeping and see information of other vehicles.
2. Implementation conditions
- User is authorized option: 4D.
3. Implementation instructions
- Go to the menu Driving Management»Driving Authority

- The function screen consists of 2 parts:
+ Add/ Edit/ Delete for one or more drivers;
+ Driver list and related information.

+ Add/Edit/Delete section for one or more drivers:
-
The user can add multiple new drivers by the following method:
Step 1: Download the sample file to fill in the information.
Step 2: Upload the completed file to the system.

-
User adds a new driver by selecting the Add button and entering the information of the driver to be added;

-
To edit or delete driver information, the user selects the row to edit/delete, then presses the edit/delete button, and finally clicks Yes button to save the changes..

+ Driver List and Related Information Section: Displays drivers and their related information; allows the user (NSD) to assign permissions to drivers for attendance tracking, alcohol concentration testing, receiving system notifications, viewing phone numbers of other drivers in the team, and allowing drivers to review their attendance history.

-
The user can assign permissions to the driver by clicking on the Edit column button
 The permissions display screen is as follows:

-
In the System Function section, the user is allowed to assign the following rights to the driver:
-
Chấm công: Allows drivers to record attendance via the Edriver app.
-
Đo nồng độ cồn: Enables drivers to perform alcohol concentration tests through the Edriver app connected to an alcohol testing device.
-
Đo nồng độ cồn trực tiếp cho xe: Allows drivers to change vehicles when performing alcohol concentration tests on the Edriver app.
-
Phải đo nồng độ cồn trước khi chấm công: Requires drivers to perform an alcohol test before recording attendance on the Edriver app.
-
Sổ địa chỉ: Allows drivers to view the contact phone numbers of other drivers when needed.
-
Thông báo: Enables drivers to receive notifications from the system.
-
Xem bản ghi chấm công: Allows drivers to review their attendance history.
-
-
In the Cars display section, the user selects the vehicles and drivers assigned to control in the fleet.
-
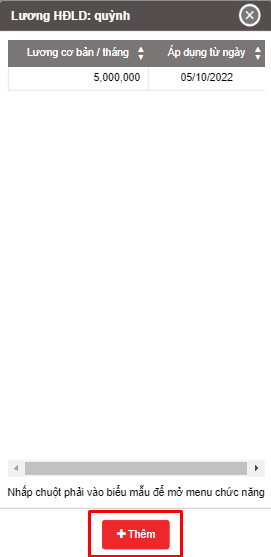
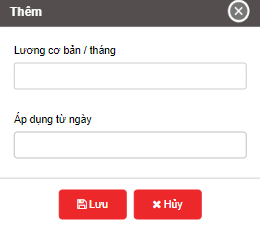
The user can set the salary for the driver by pressing the button
 . The screen displays the authorization as follows:
- Log in to post comments
- Tiếng Việt
- 繁體中文
Announcement Settings
1. Purpose
- This function allows users to set up notifications to drivers according to preset times and limit the maximum number of messages displayed on the journey monitoring system and on the Edriver app.
2. Implementation conditions
- The user is authorized at option: 4D.
3. Implementation instructions
- Go to the menu Driving Management»Announcement Settings

- The function screen consists of 2 parts:
+ Settings/ Add/ Edit/ Delete section: allows setting the maximum number of messages to display and setting notifications to drivers according to preset times;
+ Message details section: Displays details of Message setting date and Message content.

+ Setting/Add/Edit/Delete:
-
Setting:
 Allows setting the number of notifications to display the notification count on the journey monitoring system and on the Edriver app (maximum of 500 notifications).

-
Add
 allows users to add a new notification. The function screen displays:
-
Start time: Default is the current date and allows users to edit according to the date and time needed to notify
-
End time:
-
Team;
-
Title: Users enter the title for the notification;
-
Content: Users enter the content for the notification, up to 1000 characters;
-
Select Yes button to release the notification to drivers;
-
Select Cancel button if you do not want to release the notification.
-

-
Edit
 Allows users to edit the content and time of sending notifications: Select the notification line that needs to be edited and press the Edit button, then re-select the date, time, title and content of the notification that needs to be edited and press Yes button;
 -
Similarly, if you want to delete a notification, the user selects the notification line to delete and presses the Delete button
 , then Agree to delete..
- Log in to post comments
- Tiếng Việt
- 繁體中文
Punch Check
1. Purpose
- This function allows saving the attendance records of drivers in cases where the driver forgets to record attendance and performs the attendance check after the deadline on the Edriver app.
2. Implementation conditions
- The user is authorized at option: 4D.
3. Implementation instructions
- Check attendance on the EDriver VN driving app. See the attendance instructions in section 2. Check in/out in the EDriver app User Guide (https://eup-wiki.gps247.vn/node/215)
- Go to the Driving Management»Punch Check

- The function screen consists of 2 parts:
+ Fleet Queries section: allows users to search for a list of drivers who forgot to clock in and have re-clocked within a period of time selected by the user;
+ Report details section displays search results and allows users to approve late clocking of drivers.
+ Fleet Queries section: the user selects the following information:
-
From: The user enters the first day to create the report;
-
To: The user selects the last day to create the report;
-
Full Approval: Allows the user to approve all driver attendance lists at once;
-
Attendance status includes 3 statuses:
-
-
Rejected: Attendance status that the user has refused to approve;
-
Unreviewed: Attendance status that has not been approved;
-
Passed: Attendance status that has been approved.
-
-
-
Click Search to search the list. The search results are displayed in the list section.
-
+ Fleet Queries section includes information:
-
Status: Is the attendance status;
-
Name;
-
Plate number;
-
Swipe status: Including working or taking time off;
-
Swipe Time;
-
Reason: Is the driver's note updated on the Edriver app when performing overdue attendance;
-
Review: For unapproved attendance lines, if you want to approve, select Confirm, if you want to Pass, select Reject;
+ Select the icon  to print the report
+ Select the icon  to download the report as excel
+ Select the icon  to Custom Field, Plate number field settings, Print signature settings
- Log in to post comments
- Tiếng Việt
- 繁體中文