Instructions for downloading and using video recording applications
A- Software installation
1. Download the file to your computer and install:
https://eup.net.vn/setup-DVRLiveStreaming.msi
2. Run the newly installed DVR LiveStreaming software and log in with your customer account (if the virus scanner or firewall has a warning, select Allow to run the software)
B- User manual
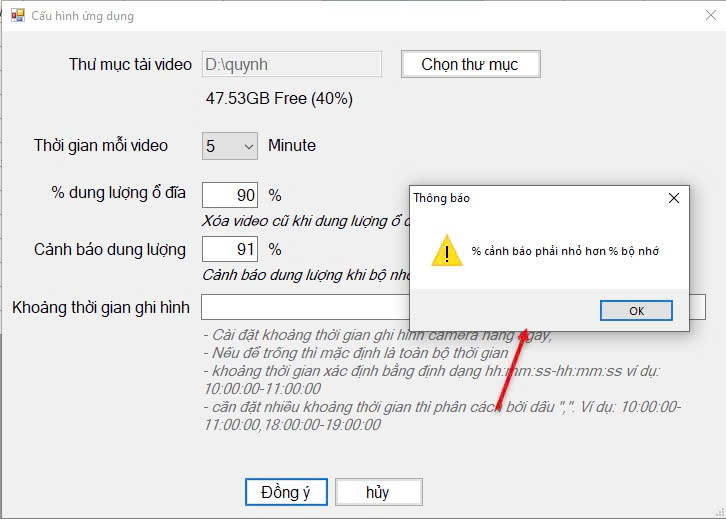
I- Configuration section:

-
Select a folder to save the video on your computer
-
The time of each video is the time to cut the video according to the selected duration
-
% disk capacity: to delete old videos when the disk capacity exceeds the selected configuration
-
Warning capacity…%: Warns when the used capacity is larger than the % memory of the video storage folder. + + If the capacity exceeds the set %, there will be a warning with the content "Memory is almost full, please delete some memory or old data will be lost". + Warning capacity…% must be less than % disk capacity, if a larger % is entered, there will be a message "Warning % must be less than % memory"
-
5. Auto recording time (leave blank for all time of day)
II. Camera Management Section:

-
Select to view cameras directly by vehicle (only one vehicle can be viewed at a time)
-
Select the cameras you want to monitor directly

1. Select the vehicle to record
2. Select the cameras of the vehicle to record
3. Select Record camera: from the moment you click the Record camera button, the software will record the cameras of the selected vehicle
4. Select Stop recording camera if you do not want to save the video to your computer anymore
5. Open the video download folder to review the videos that have been downloaded to your computer
III. Video recording history:

- Select the vehicle to review the video history
- Select the cameras to review of the selected vehicle
- Select the time period to review the video recording history
- Search videos: search the video history according to the selected parameters
- Press the button to view the video
VI. Merge videos:

- Select Simultaneous View: combine fragmented videos into a single video in the list to watch (merge by camera)
- Click Search Videos: search video history according to selected parameters
- Click the button to view merged videos by camera
- Log in to post comments
- Tiếng Việt
- 繁體中文